Introduction
The F-1 visa is the most common student visa in the United States. If you want to attend a U.S. college, university, or academic language program, the F-1 is likely the visa you need.
Getting an F-1 visa takes planning and preparation. But the process is straightforward when you know what to do — and in what order. This guide walks you through every step.

Key Takeaways
- Get accepted by a SEVP-certified school first — before applying for the visa
- Your school sends you Form I-20 after acceptance — you need this for the visa
- Pay the SEVIS fee (Form I-901) before your visa interview
- Complete the DS-160 online visa application and schedule your consulate interview
- Show strong ties to your home country and proof of financial support at the interview
- Maintain your F-1 status by attending school, keeping full-time enrollment, and not working illegally
Step-by-Step: How to Get an F-1 Visa
Step 1 — Get Accepted by a SEVP-Certified School
Before anything else, you must be accepted by a school that is certified by the Student and Exchange Visitor Program (SEVP). Almost all accredited U.S. colleges and universities are SEVP-certified. The school must accept you for full-time study.
Step 2 — Receive Your Form I-20
After acceptance, your school’s Designated School Official (DSO) will issue you Form I-20 — Certificate of Eligibility for Nonimmigrant Student Status. This is the key document for your visa application. It confirms your school, your program, your start date, and your estimated costs.
Step 3 — Pay the SEVIS Fee
Before your visa interview, you must pay the SEVIS fee — currently $350 for F-1 students (fees may change, always verify). You pay this at fmjfee.com using Form I-901. Keep the payment receipt. You will need it at your interview.
Step 4 — Complete Form DS-160
DS-160 is the online visa application form. You complete it at ceac.state.gov. Be honest and thorough. Answer every question carefully. After submitting, you will receive a confirmation page with a barcode — print it and bring it to your interview.
Step 5 — Schedule Your Visa Interview
Contact the U.S. consulate or embassy in your home country to schedule your F-1 visa interview. Wait times vary by location and season. Apply early — especially if your program starts in August or September, when demand for student visas is highest.
Step 6 — Prepare Your Documents
Bring all required documents to your interview:
- Valid passport (valid for at least 6 months beyond your program end date)
- DS-160 confirmation page
- SEVIS fee receipt (Form I-901)
- Form I-20 from your school
- Visa application fee payment receipt
- One passport-sized photo
- Proof of financial support — bank statements, scholarship letters, sponsor letters
- Proof of strong ties to your home country — family, property, employment plans
- Academic transcripts and test scores (TOEFL/IELTS, SAT/ACT if required)
Step 7 — Attend the Visa Interview
The interview is usually short — 5 to 10 minutes. The consular officer wants to understand why you want to study in the U.S. and confirm that you intend to return home after graduation. Be honest, be confident, and be prepared to answer questions about your school, program, career goals, and financial situation.
Step 8 — Wait for Visa Processing
If approved, your passport will be returned to you with the F-1 visa stamped inside. If denied, the officer will provide a reason. Common reasons for denial include insufficient proof of financial support or ties to the home country.
Step 9 — Travel to the United States
You can generally enter the U.S. up to 30 days before your program start date. At the port of entry, a Customs and Border Protection (CBP) officer will review your documents and admit you. Your Form I-94 (arrival/departure record) will show your admission status.
Maintaining Your F-1 Status
Getting the visa is just the beginning. You must also maintain your F-1 status while in the U.S. Key rules:
- Attend classes and maintain full-time enrollment (usually 12 credit hours per semester for undergraduates)
- Do not work off-campus without proper authorization (CPT or OPT)
- Report any changes in address, major, or program to your DSO
- Keep your passport and I-20 valid
- Do not transfer schools without proper SEVIS transfer procedures
- Follow the rules for travel outside the U.S.
Your DSO (Designated School Official) at your school’s international student office is your most important resource. Keep in regular contact with them throughout your studies.
Common Reasons F-1 Visas Are Denied
- Not enough evidence of financial support for full tuition and living costs
- Weak ties to the home country — the officer does not believe you will return home
- Inability to explain why you chose this school or program
- A prior U.S. visa violation or overstay
- Incomplete or inconsistent information on the DS-160
How MY-VIET Helps Students
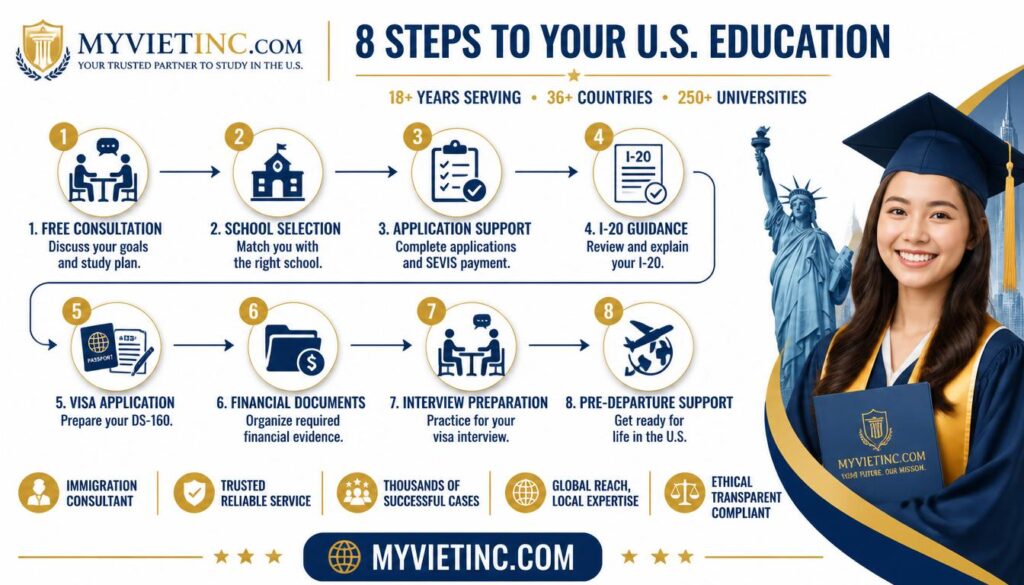
MY-VIET has helped international students successfully obtain F-1 visas and enroll in U.S. schools for over 18 years. We assist with school selection from our network of 250+ partners, document preparation, DS-160 guidance, financial documentation support, and visa interview preparation.
Frequently Asked Questions
How early can I enter the U.S. before my classes start?
F-1 students can enter the United States no more than 30 days before the start date listed on their Form I-20. Do not travel too early.
What happens if my F-1 visa expires while I am in the U.S.?
The visa is only an entry document. As long as you are maintaining your F-1 student status, you can stay in the U.S. even if your visa stamp expires. You only need a valid visa stamp when re-entering the U.S. from abroad.
Can I change my major or transfer schools?
Yes, but you must work with your DSO to update your SEVIS record. Changing schools requires a proper SEVIS transfer. Failing to follow the correct process can jeopardize your student status.